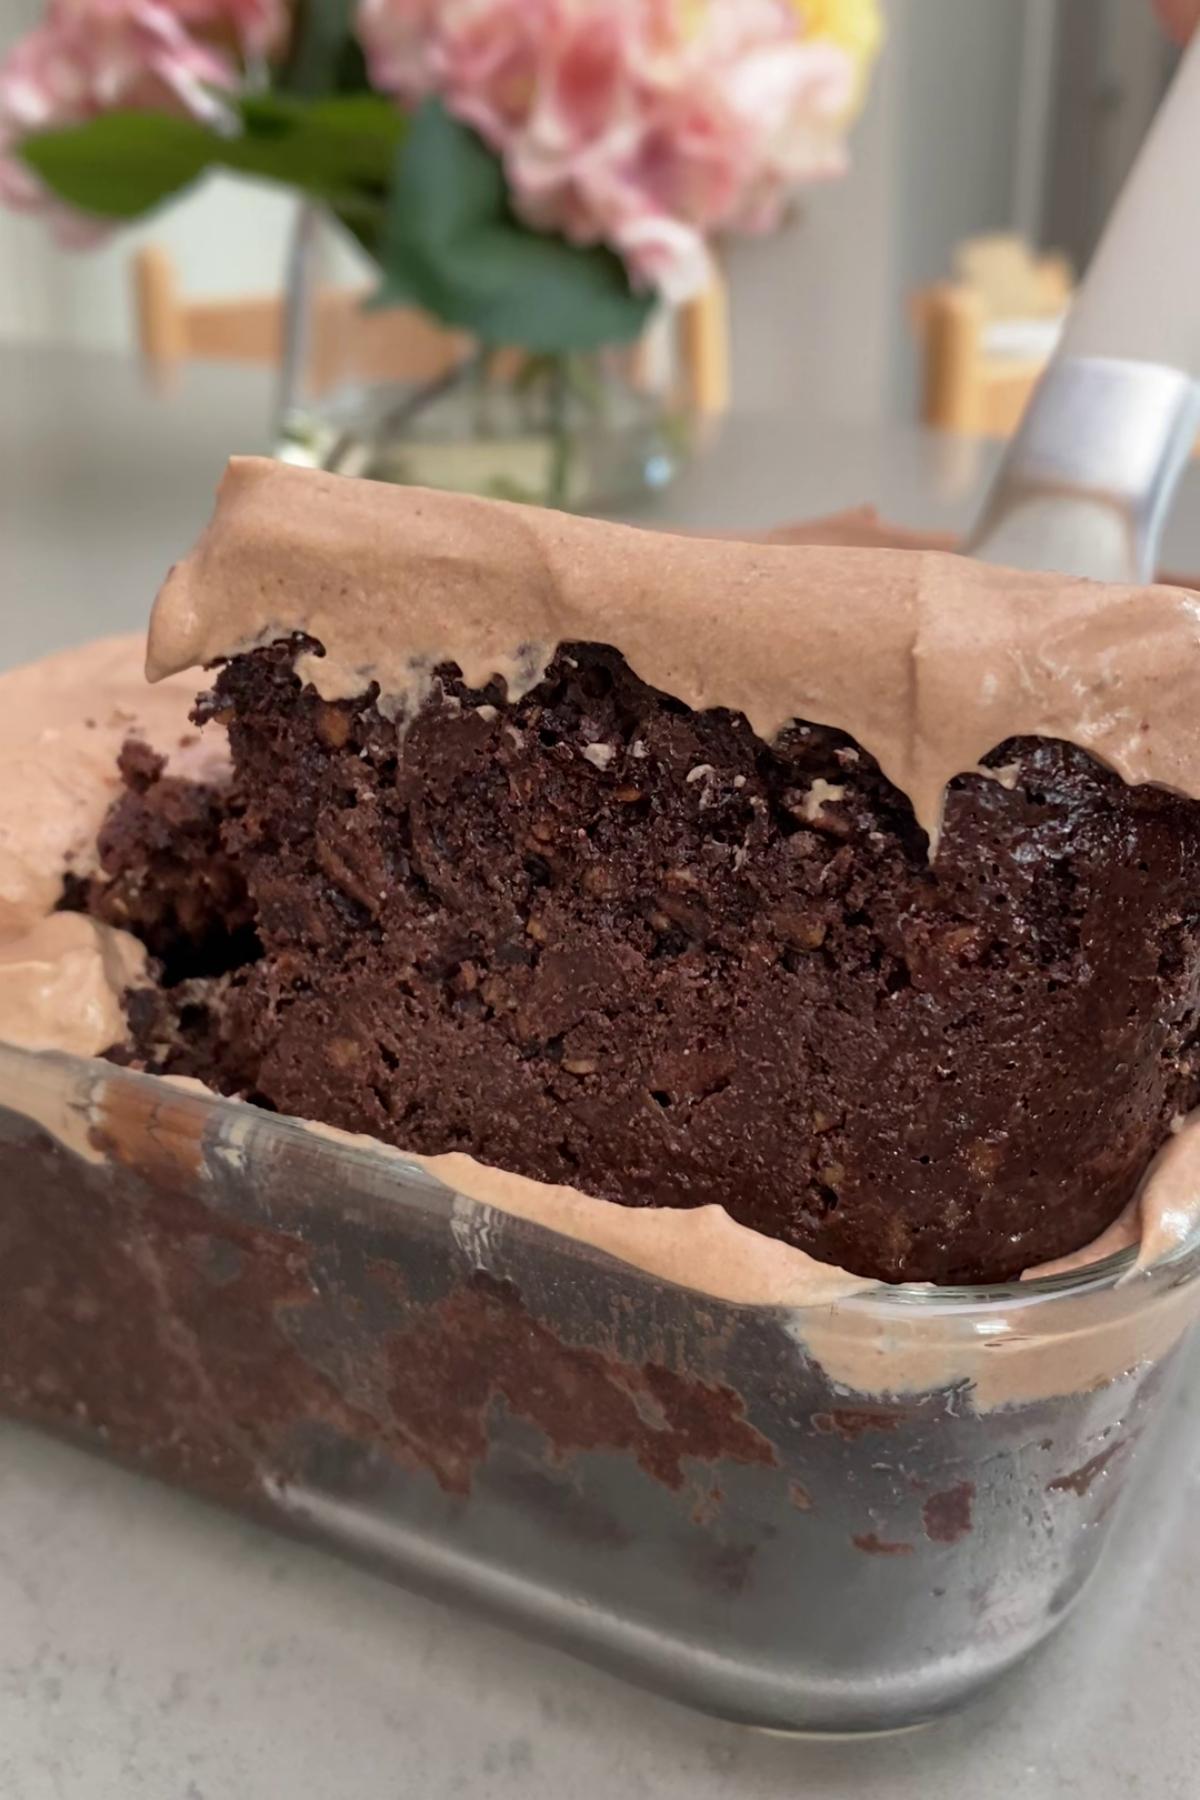
Who said brownies can’t be breakfast? These baked oats are cakey, rich and super satisfying thanks to the nut butter and hearty oats. They are topped with a thick creamy protein-yogurt frosting that’s creamy and fresh with just a hint of tang to cut through the richness.
Jump to:
Why Baked Oats?
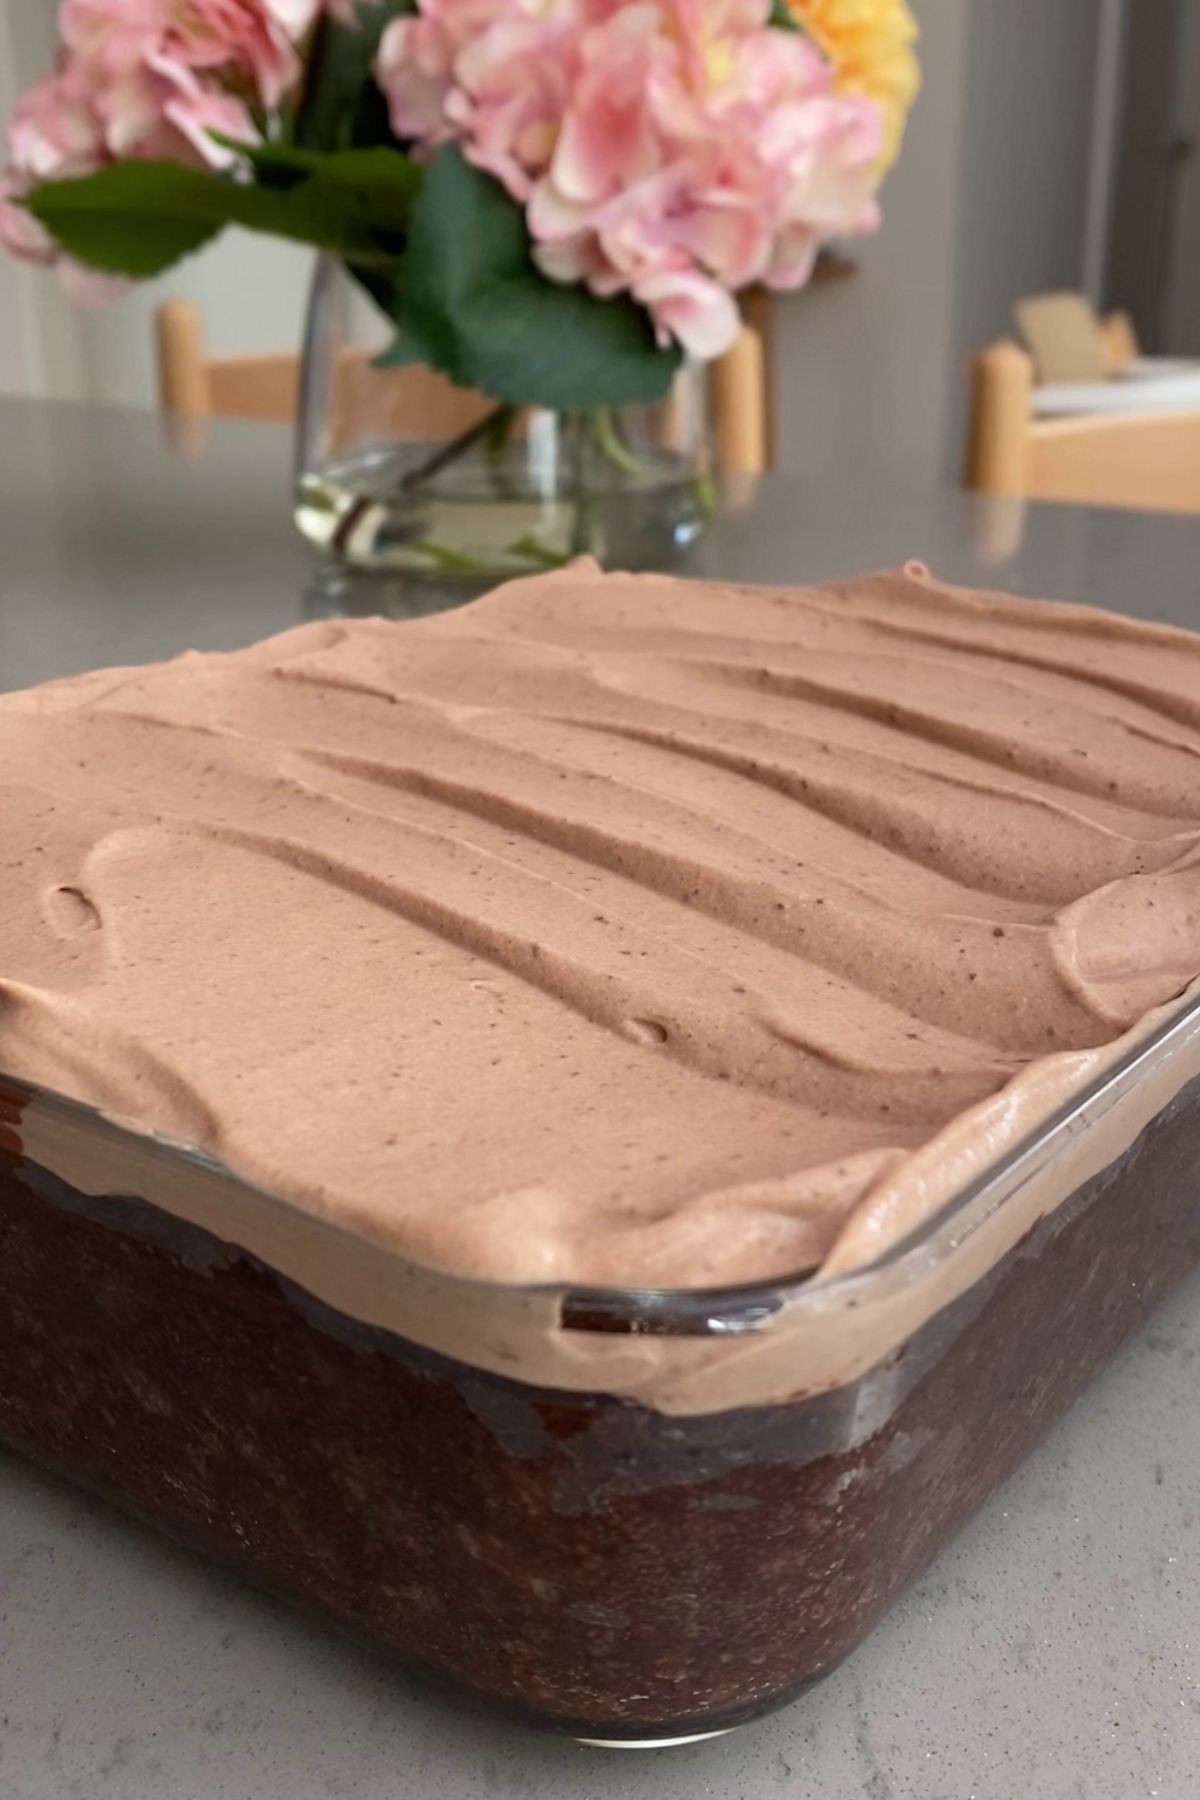
If I’ve become known for one thing, it’s oats recipes. I am probably best known for blended oats recipes but I am broadening my horizons by creating more baked oats recipes. I love that baked oats taste like cake and are almost just as easy to prepare as regular overnight oats. You mix, bake and top with frosting! I like to bake them on a Sunday to prep for the week ahead. I bake directly in a glass food storage container, cool, dollop on frosting then pop the lid on and into the fridge.
They’ll keep well for 3-4 days and the beauty of the frosting is that it keeps the oats from drying out too much.
Why You’ll Love Brownie Baked Oats
- The texture is like a dense cake and it feels more like dessert than breakfast but made from mostly oats.
- The yogurt frosting is creamy and tangy, which cuts through the richness. It’s the extra layer that makes it feel complete.
- Uses pantry staples like oats, cocoa, and nut butter. Trust the process, you don’t need anything fancy.
- Leftovers stay good in the fridge for days. Can confirm it’s excellent eaten cold with a spoon.
Ingredients You’ll Need
This recipe is built on basics and mostly pantry staples – I’ve made a shopping list for you below. The exact measurements are all waiting for you in the recipe card at the bottom of this post.
Here’s what you’ll need:
- Rolled oats
- Milk (I prefer unsweetened soy but any milk is fine)
- Espresso
- Cocoa powder
- Maple syrup
- Vanilla extract
- Almond or cashew butter
- Salt
- Chocolate protein powder (optional)
- Baking powder
- Baking soda
- Apple cider vinegar or lemon juice
- Dark chocolate chips
- Yogurt (I use soy or coconut but any will do)
- Maple syrup (for frosting)
Instructions
Sometimes baking feels like a project, but this one’s beginner-friendly and comes together in one bowl with barely any cleanup.
You’ll find all the exact times, temperatures, and measurements in the recipe card at the bottom of the page.

Step One: Start by mixing the dry ingredients in a large bowl so everything is evenly combined.
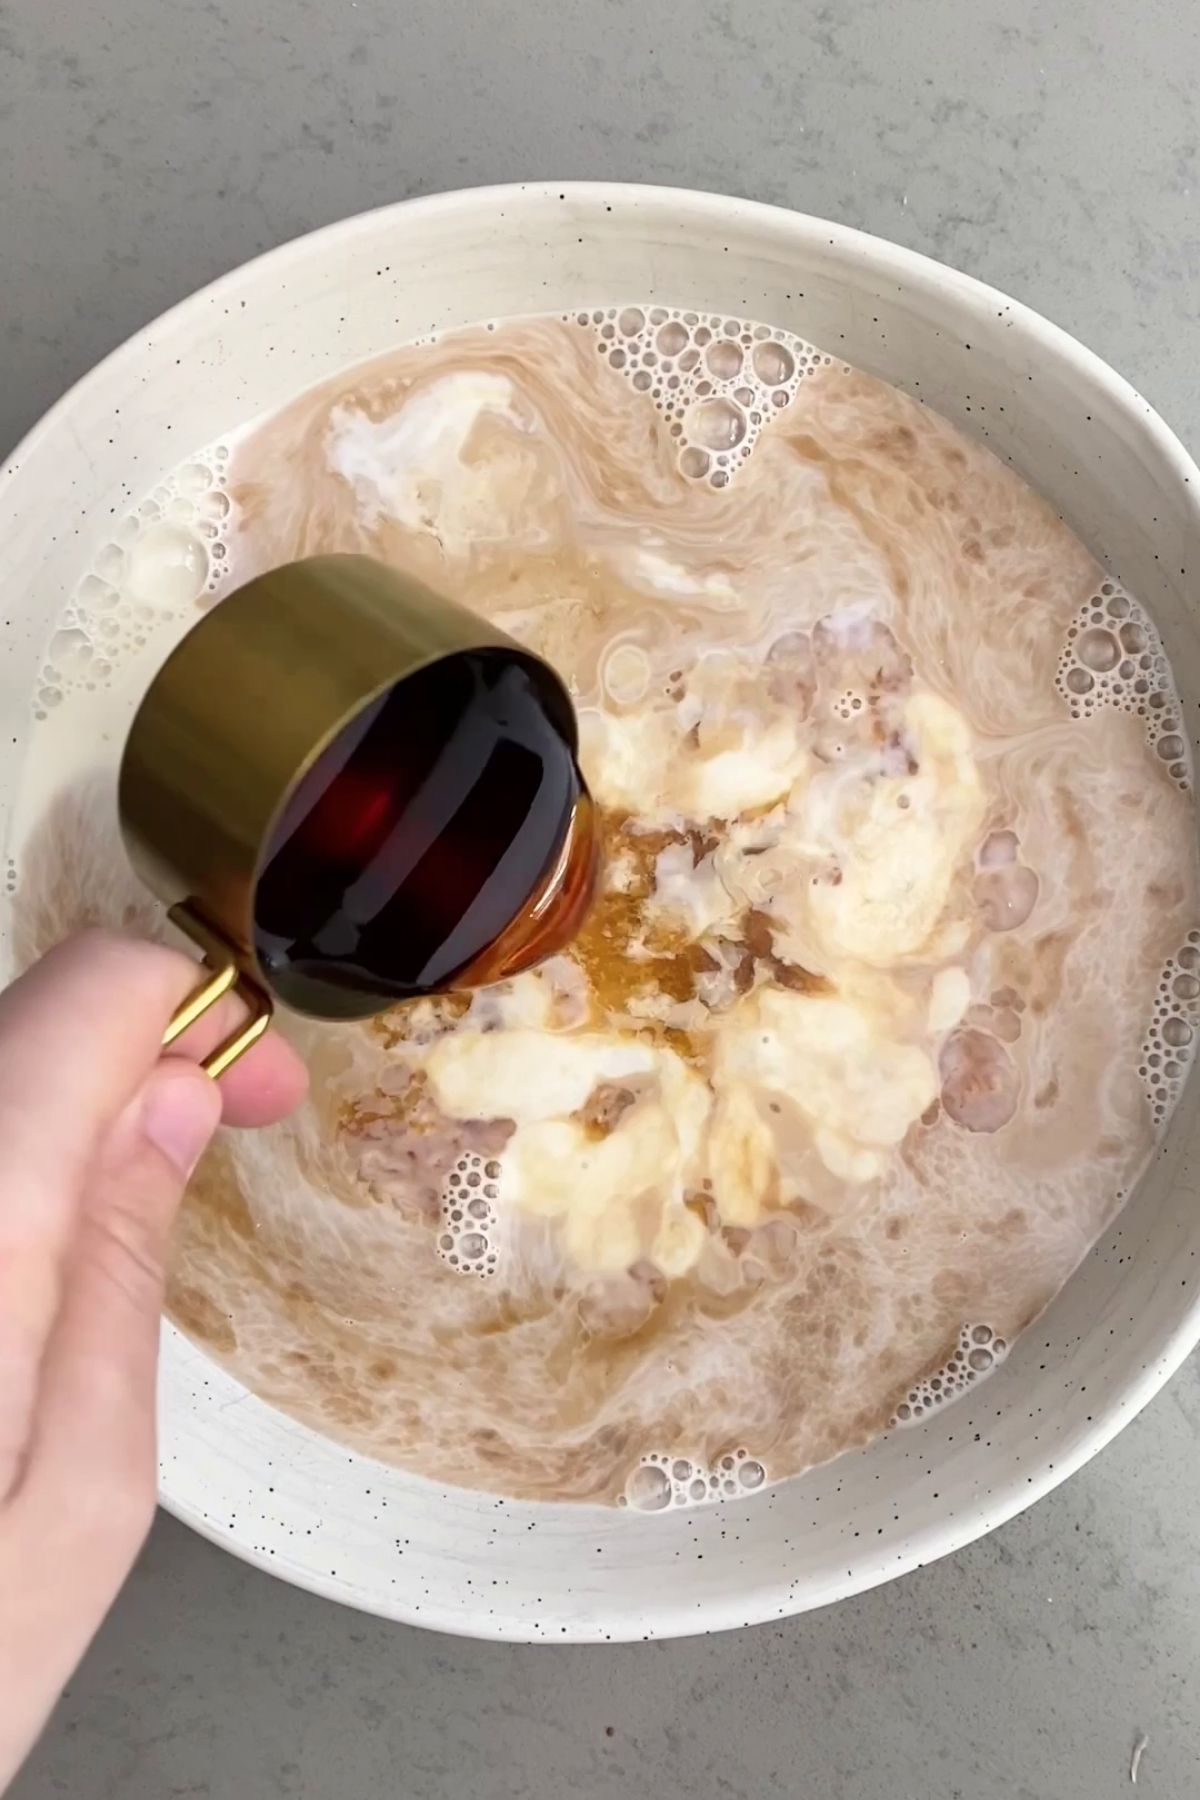
Step Two: In a separate bowl, whisk together the wet ingredients until smooth.
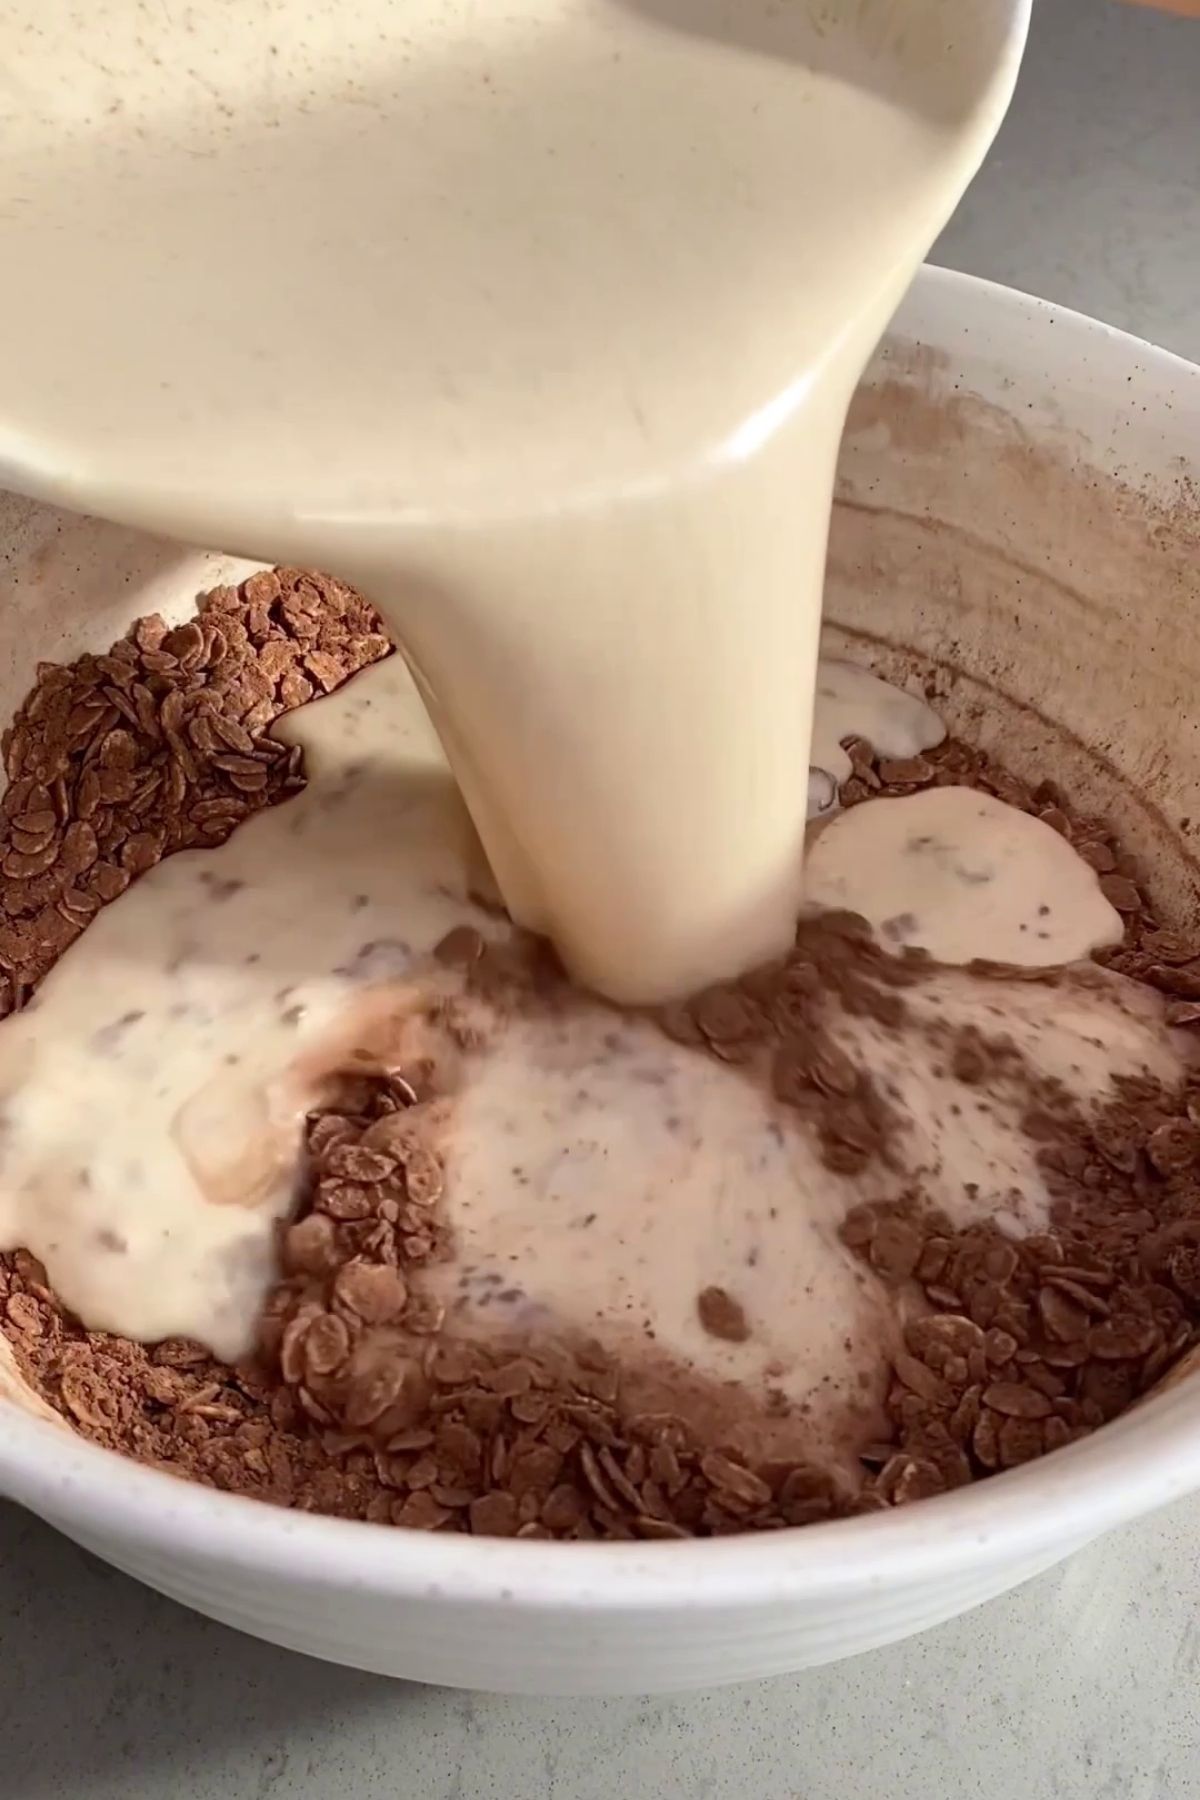
Step Three: Pour the wet mixture into the dry and stir until just combined.
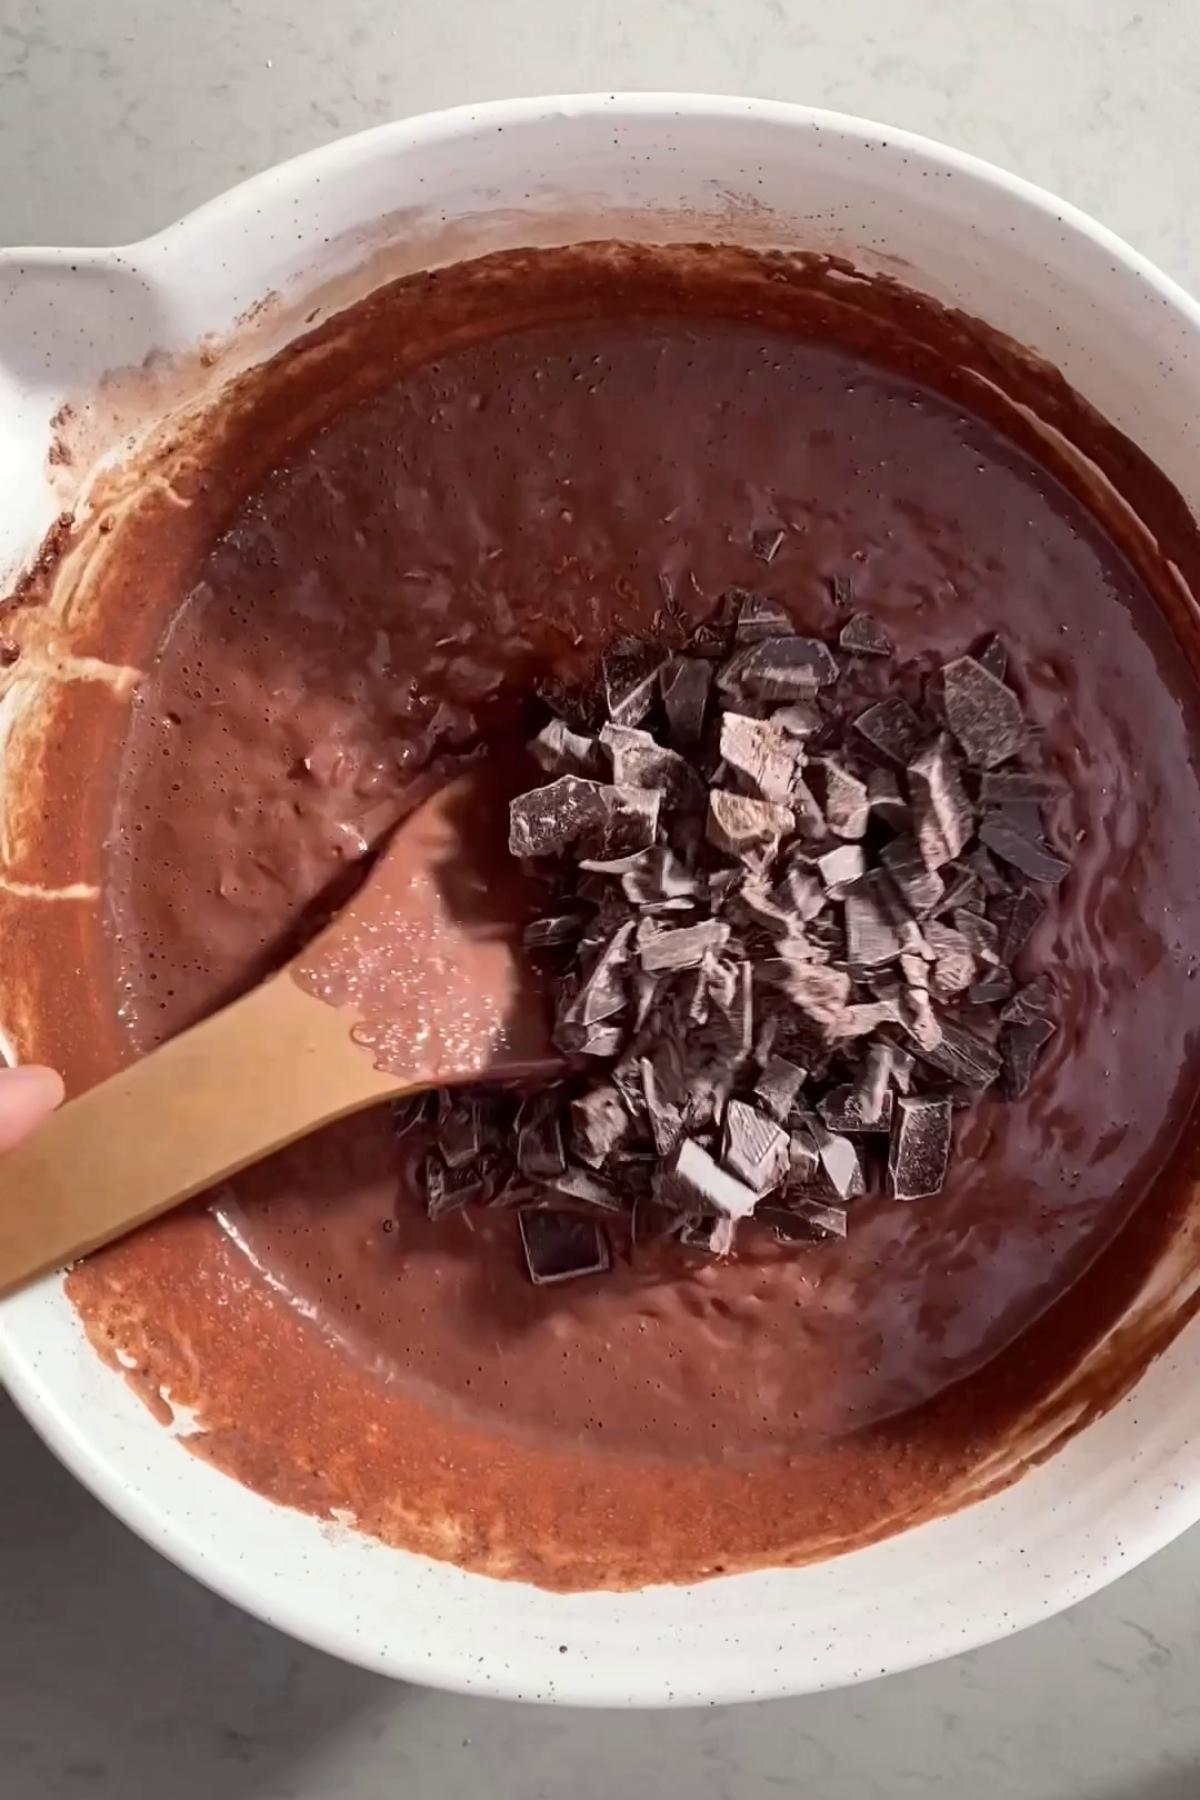
Step Four: Fold in the chocolate chips so they’re spread evenly through the batter.

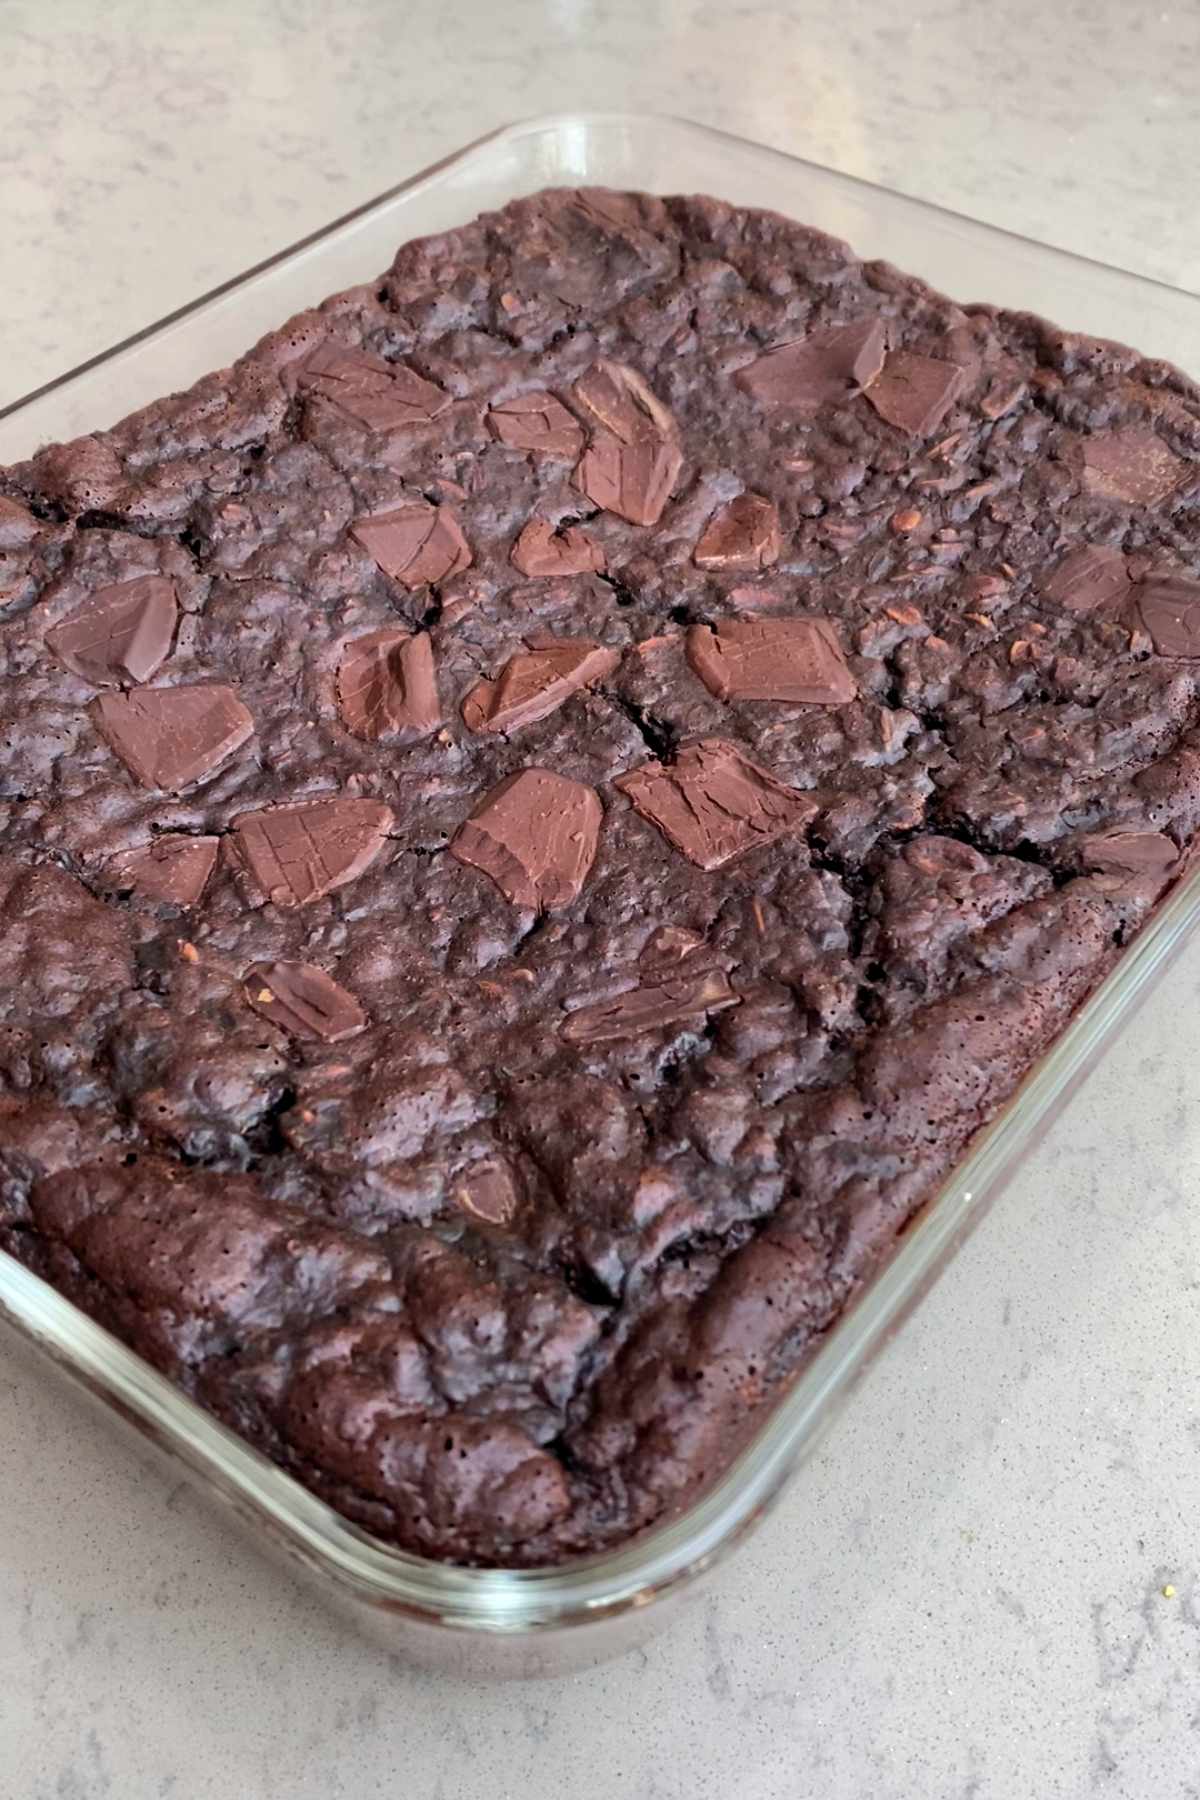
Step Five: Transfer the mixture into a prepared pan and smooth out the top.
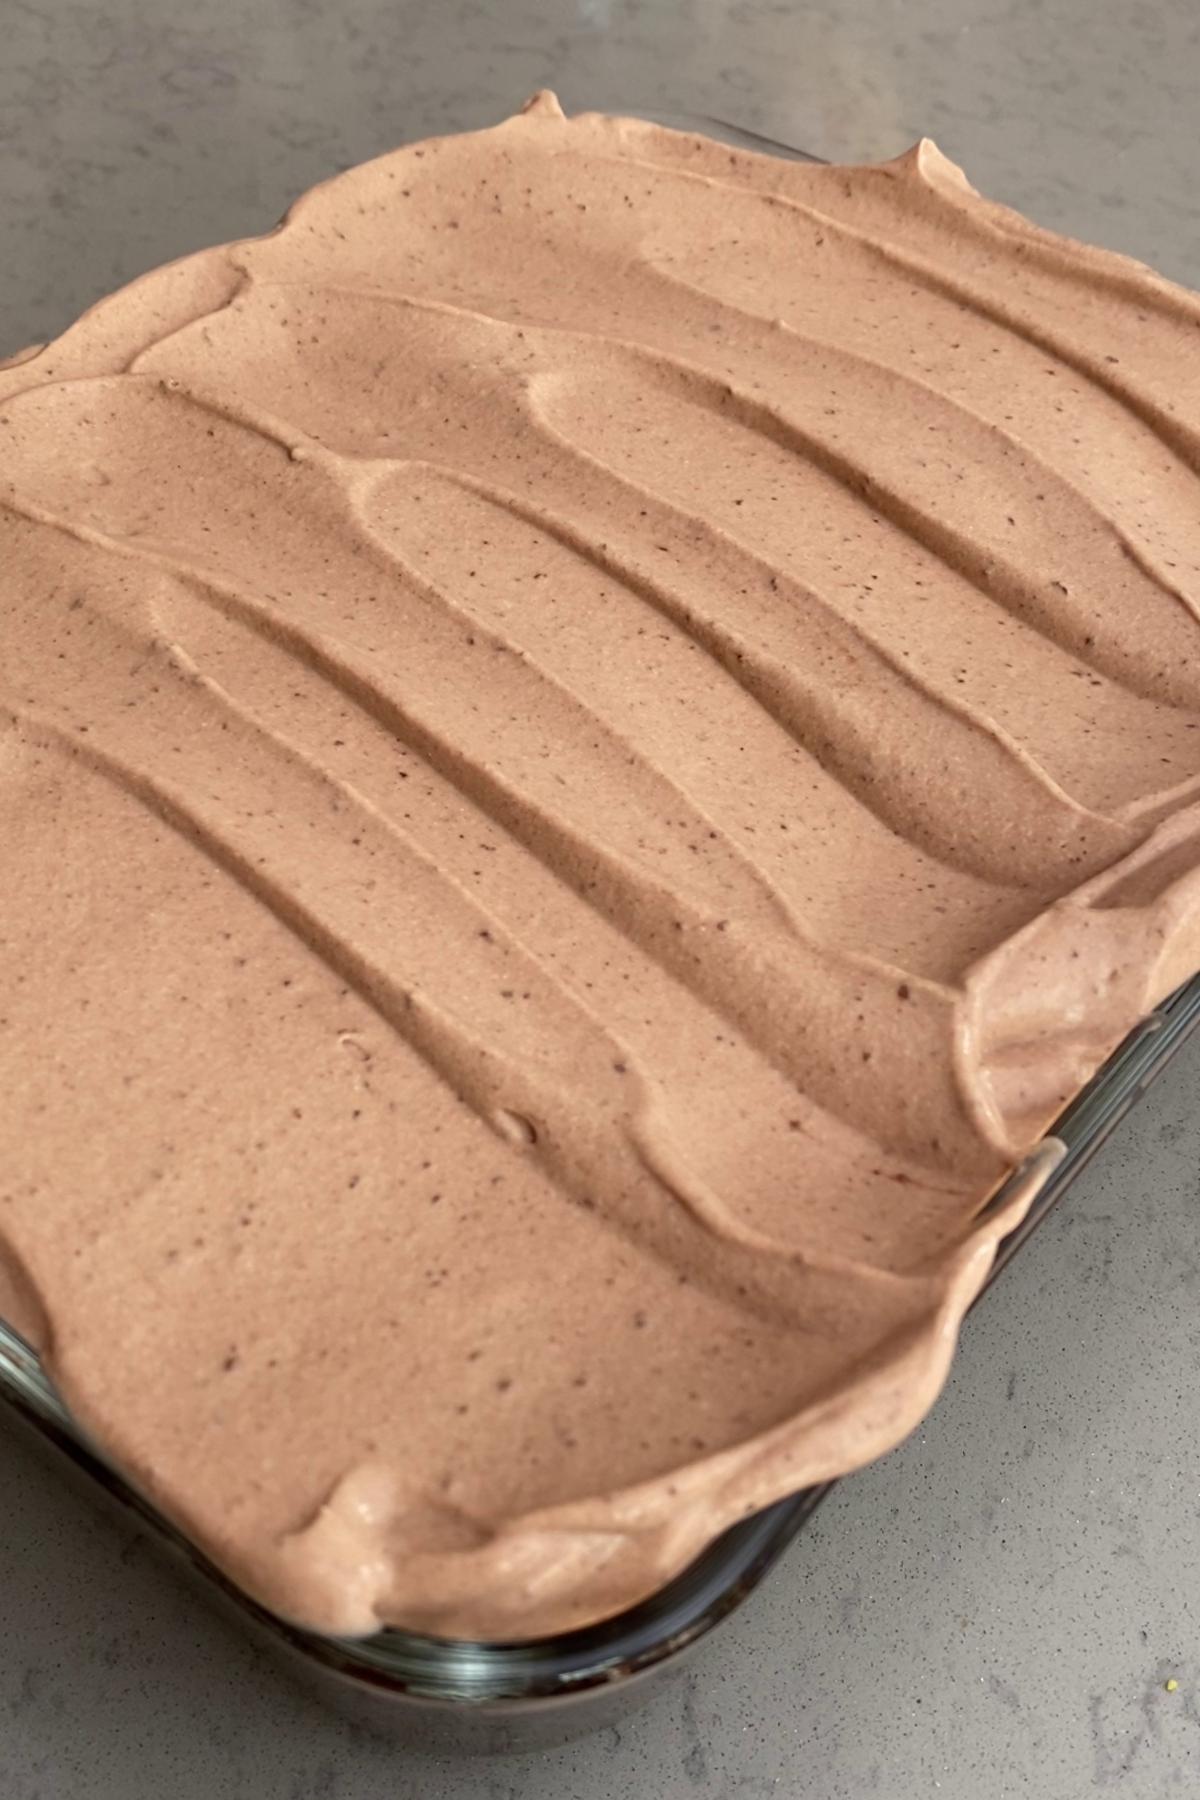
Step Six: Once baked, let it cool fully before spreading the yogurt frosting over the top.
Substitutions & Variations
You can’t go too wrong with baked oats as long as you maintain the wet and dry ratios and the base ingredients, but of course if you remove or add flavored ingredients, it will change the overall result. Here are a few small tweaks you can try if you’re missing an ingredient or two without affecting the final taste much:
- Nut butter – peanut butter also works fine instead of almond or cashew butter.
- Milk – any milk will work. I eat plant-based and prioritize protein, so I choose soy but choose what works best for you. Just remember it will change the nutritional value depending on the kind of milk you choose (oat milk for example is creamy but quite low in protein). If you’re curious to learn more, Healthline has compared the nutritional profiles of dairy and plant milks.
- Protein powder – can be omitted. I love it though as a convenient protein boost for the day and it makes it that much more filling. Plus, when you mix protein powder into the yogurt frosting it makes it so mousse-y and fluffy. My personal preference is Ora protein – it’s USDA certified organic, has 23g protein per serve, is smooth and not too sickly sweet like some other proteins can be.
- Coffee – I promise the flavor is not strong, it just makes the chocolate taste even richer. But if you’re sensitive to caffeine, you can leave it out. A teaspoon of instant coffee mixed with a splash of water will do if you don’t have an espresso machine.
Storage
If you’ve got leftovers, here’s how to keep them tasting great:
- Store slices in an airtight container in the fridge. They’ll keep well for 3-4 days.
- If you prefer your oats warm, keep the frosting separate and reheat a plain slice before adding a dollop of the frosting. For reheating, the microwave is the fastest.
- You can also freeze portions without the frosting. Wrap each slice, then stash in a freezer bag. Defrost overnight in the fridge and it’s ready to go.
Expert Tips

These Baked Brownie Oats taste delicious warm or cold. If you plan on warming them, I recommend storing the frosting separately. The frosting mixture is mostly yogurt and protein powder, so it will thicken and cook in the microwave (not what we are going for here). Better to heat bare slices of brownie separately and then dollop with the cold frosting to serve.
FAQ
If you don’t have an espresso machine, you can use strong filter coffee or a heaped teaspoon of instant mixed with a tablespoon of boiling water. I love using coffee because it really enhances the chocolate notes but doesn’t actually taste like coffee. But if you’re sensitive to caffeine you can leave it out (just a little splash of extra milk to compensate).
Not at all. It just makes the oats a bit more filling, but the recipe still works perfectly without it. If you’re looking for a protein powder I highly recommend Ora protein – very smooth and not too sweet.
I have only tested this recipe with rolled oats, however I have used rolled and quick oats interchangeably in other baked oats recipes and haven’t noticed a huge difference. Quick oats are finer and seem to have a softer, more crumbly texture overall. They should still work – just make sure you are using quick oats not instant or 1 minute oats which are too fine.
Serving Suggestions
These brownie baked oats taste delicious warm or cold – but if you intend on warming them, make sure to keep the yogurt frosting separate. Otherwise, the yogurt frosting will go a bit funky in the microwave.
If you like baked oats, you’ll love blended oats
Some other baked oats recipes I love are my Lemon Blueberry Baked Oats with a creamy yogurt swirl. They’re just as satisfying but a little lighter than this brownie oats. Or if you want to lean into the rich dessert vibe, there’s also my Tiramisu Baked Oats.
Now, not to push you into a new recipe before you’ve had a chance to try this one BUT once you’ve tried baked oats, you should definitely try my specialty: blended oats. When blended, oats form a gooey, thick, batter-like consistency – my Cookie Dough Oats, Chocolate Blended Oats and Blueberry Overnight Oats are the most popular. They taste like pudding and have gone viral on social media countless times. So apparently I’m not the only one who loves tricking myself into eating healthier haha.
Baked oats are a fun and easy way to make eating breakfast fun and delicious. Let me know what you think of this recipe in the comments below or feel free to tag me on socials (I am @glowdiaries___ on all channels). I love to see what you’re cooking up!

Brownie Baked Oats
Equipment
- Oven
Ingredients
- 2 ¼ cups rolled oats approx. 255 g
- ½ cup unsweetened cocoa powder 42 g
- ¼ cup chocolate protein powder optional (25–30 g)
- 1 ½ tsp baking powder 6 g
- ½ tsp baking soda 3 g
- ¼ tsp salt 1 g
- 2 ¼ cups milk 540 ml (I use soy)
- 2 tbsp maple syrup 42 g
- 1 tbsp vanilla extract 14 g
- 3 tbsp almond or cashew butter 51 g
- 1 tbsp apple cider vinegar or lemon juice 15 ml
- 1 shot espresso or 2 tablespoons strong brewed coffee 30 ml
- ½ cup dark chocolate chips 85 g
Frosting
- 2 ½ cups thick yogurt 565 g (I use soy)
- ¼ cup unsweetened cocoa powder 21 g
- 1 tsp maple syrup 7 g
- Pinch of salt about 1/16 teaspoon
Instructions
- Preheat oven to 350°F (180°C). Grease or line an 11×8-inch (28×20 cm) baking pan with parchment paper.
- In a large bowl, whisk together the oats, cocoa powder, protein powder (if using), baking powder, baking soda, and salt.
- In a medium bowl, whisk the soy milk, maple syrup, vanilla, nut butter, vinegar (or lemon juice), and espresso until smooth.
- Pour the wet ingredients into the dry and stir until just combined.
- Fold in the chocolate chips. Transfer the batter to the prepared pan and smooth the top.
- Bake for 30–35 minutes, until the center is set and the edges pull slightly away from the pan.
- Let cool completely in the pan before frosting.
- For the frosting, stir together the yogurt, cocoa powder, maple syrup, and salt until creamy. Spread evenly over the cooled bake. Chill before slicing into squares.

Leave a Reply